
How to Create a Custom Shortcut in Microsoft Word
The keyboard shortcuts in Microsoft Word can be useful when proofreading, giving you quick access to common commands. But what about when a command you need doesn’t have a shortcut? The solution is to create a custom keyboard shortcut or two.
For example, rather than switching between “All Markup” and “Simple Markup” via the ribbon when tracking changes in Microsoft Word, you can assign a shortcut to the “View insertions and deletions” command. This will then let you toggle between a view where all the markup in the document is visible and one in which you get to preview the finished version.
In this post, then, we’re going to explain how to create a custom shortcut in Microsoft Word.
Creating a Custom Shortcut in Word for Windows
To create or customize shortcuts in Word for Windows:
- Go to File > Options > Customize Ribbon.
- Next to Keyboard shortcuts, click Customize at the bottom of the dialog box.
This will bring up a new dialog box with three key sections:
- Specify a command – At the top of this dialog box, you’ll see lists of Categories and Commands (e.g., to toggle markup, we would select Review Tab from the Categories list and ShowInsertionsAndDeletions from the Commands list). If you are not sure what a command does, check the Description section at the bottom of the dialog box.
- Specify keyboard sequence – Here, you will see which (if any) keys are currently assigned to a command. To change this or add a shortcut, enter a combination of keys in the Press new shortcut key field (it will tell you if you select a key combination already used elsewhere, and using the same key combination will override the existing shortcut). Make sure to include at least one function key in your shortcut (e.g., Ctrl or Alt).
- Save changes in – Here, you can select where to save the new shortcut. Typically, this will either be in a template, in which case it will also work in other documents that use the same template, or in the current document you’re working on.
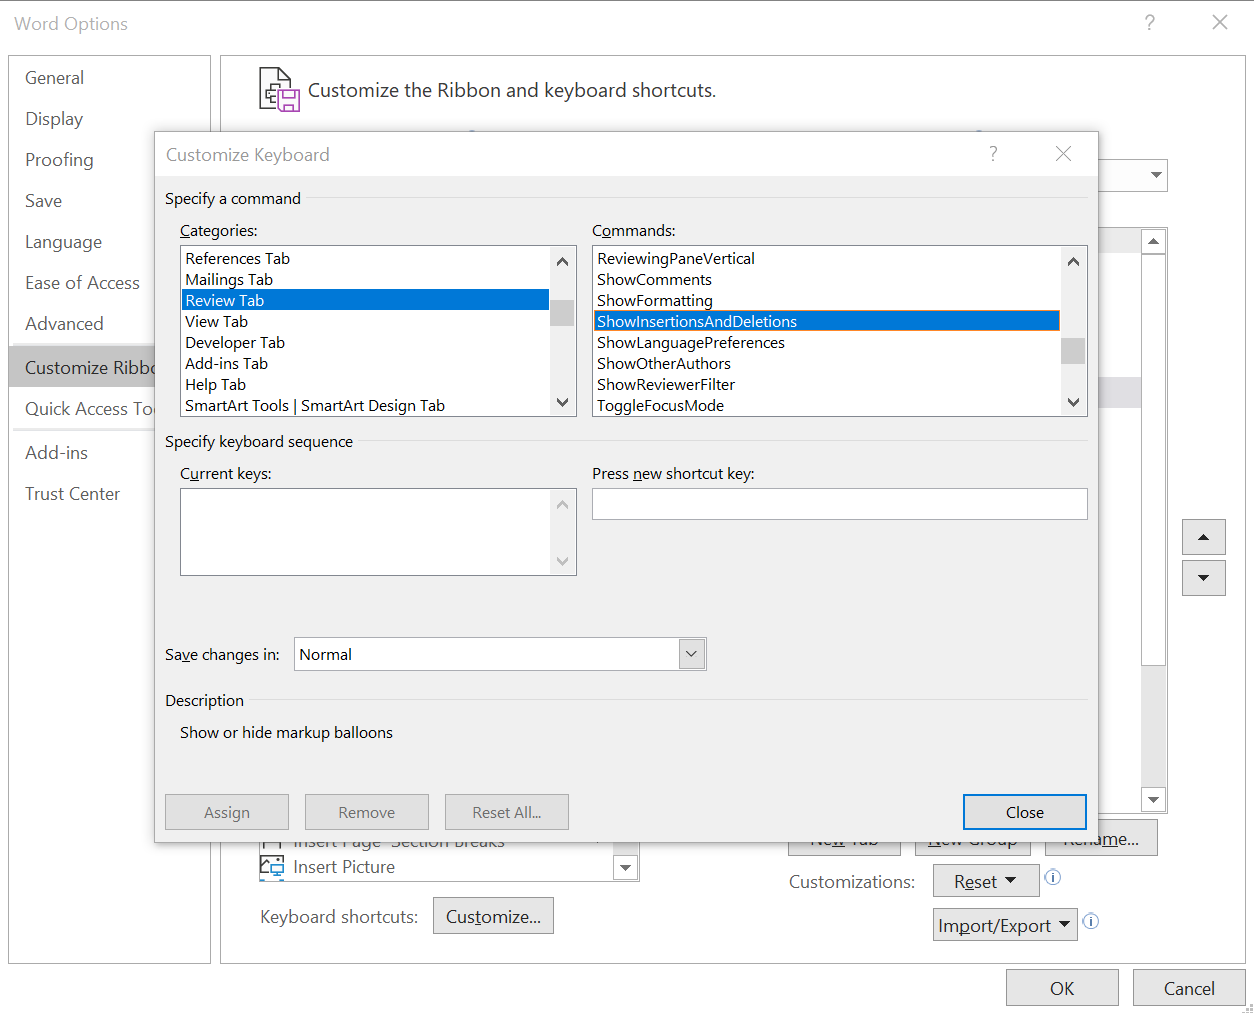
Once you’ve done all this, all you need to do is click on Assign at the bottom of the dialog box and your new shortcut will be ready to use. In addition, you can use the Remove button here to remove an existing shortcut, or Reset All to restore the original settings.
Creating a Custom Shortcut in Word for Mac
To create or customize keyboard shortcuts in Word for Mac, first go to Tools > Customize Keyboard on the menu system. This will bring up a dialog box with three key sections:
- Specify a command – Here, you can select a command via the Categories and Commands lists (e.g., to toggle markup, we would select Tools from the Categories list and ShowInsertionsAndDeletions from the Commands list). Alternatively, you can use the search field to look for a specific command. Check the Description section at the bottom of the dialog box if you’re not sure what a command does.
- Specify a keyboard shortcut – Here, you can see whether a command has a shortcut in the Current Keys field. To add (or edit) a shortcut, enter a combination of keys in the Press new keyboard shortcut field, then click Assign. Ideally, this should include at least one function key (e.g., Cmd or Ctrl). If you select a key combination used elsewhere, you will see this in the Currently assigned to field (using an existing key combination for a new command will override the old shortcut).
- Save changes in – Finally, you can also select whether to save the new shortcut in a template (i.e. so it will also work in other documents that use the same template) or just the open document (i.e., so it will only apply to the current document).
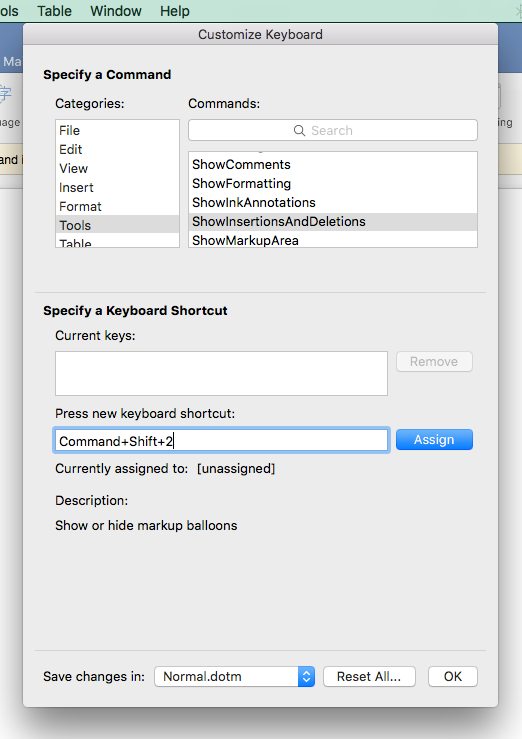
When you have assigned your new shortcut, simply click OK to close the dialog box. In addition, you can also remove existing shortcuts via the Remove option in this dialog box, or you can hit Reset All to restore the original settings and remove any changes you’ve made.
Becoming A Proofreader
Hopefully you’ll now find it easy to create a custom shortcut in Microsoft Word. For more about how to make the best use of Word as a proofreader, why not give our Becoming A Proofreader course a try? Sign up for a free trial to see how it works.


Your email address will not be published.